
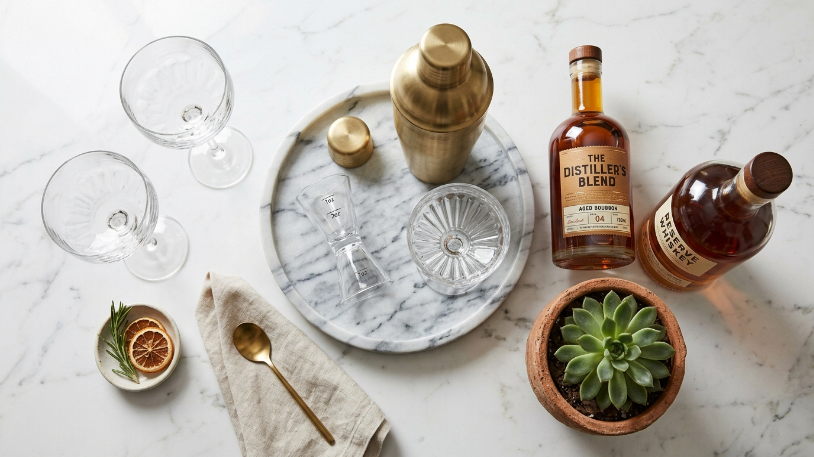
Knowing how to style a home bar is one of those skills that quietly changes the entire mood of a room. A well-put-together bar does more than hold your bottles and glasses. It becomes a focal point, a conversation starter, and honestly, the best reason for guests to linger well past dinner. The good news is that you do not need a contractor, a six-figure budget, or a design degree to pull this off.
This guide walks you through exactly how to style a home bar from the ground up. We start with the foundation: your location, your anchor piece, and your color base. Then we layer in arrangement, lighting, texture, and all the small finishing touches that pull the whole look together. By the time you reach the final step, your bar will look like something straight out of a design magazine. Nobody has to know how simple the process actually was.
A few things to keep in mind before we start. This is a styling guide, not a shopping guide. The goal is not to spend more money; it is to make smarter decisions with what you already have and what you buy next. You can style a home bar that genuinely stuns for under two hundred dollars if you are strategic about it. You can also spend a lot more and end up with something that looks like a crowded liquor store shelf, if you skip the fundamentals.
Also, this guide works for any size home bar. Whether you are working with a 60-inch built-in or a single bar cart tucked into the corner of a studio apartment, the same rules apply. The scale changes; the principles do not.
Before You Begin: What You Will Need
Before you place a single bottle, take stock of what you are working with. Here is a quick checklist to gather before you start:
- A dedicated surface, cart, cabinet, or shelf unit to anchor the bar
- Six to ten bottles of your core spirits, wines, or mixers
- At least two types of glassware (highball glasses, coupe glasses, or rocks glasses all work)
- One or two trays in complementary materials
- A small set of bar tools: a cocktail shaker, jigger, and bar spoon
- A light source, whether a lamp, LED strip lights, or puck lights
- At least one plant, candle, or decorative object for softness
- A backdrop plan: wall color, a mirror, open shelving, or art
You do not need all of these on day one. Having a clear picture of what you are building toward, however, will stop you from making impulse purchases that do not fit the look. Knowing your plan early means you can source items gradually and still land on a cohesive result.
Step 1: Choose Your Location and Define the Space
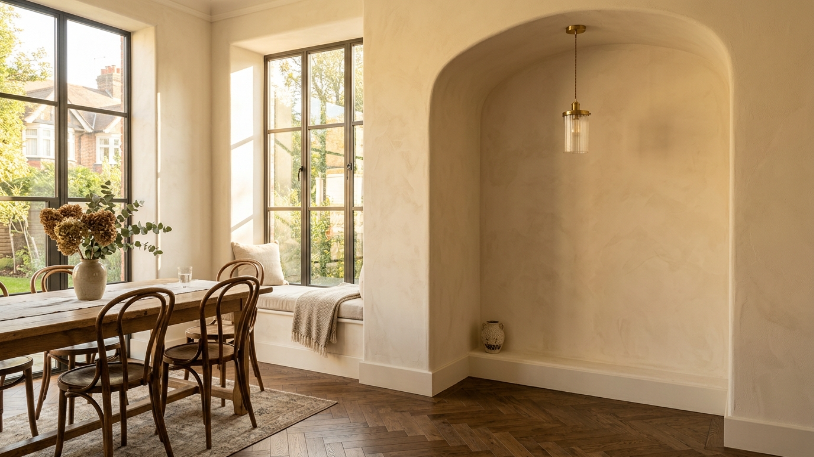
The first decision you need to make when you style a home bar is where it will live. Location matters more than most people realize. A bar crammed into an awkward corner with no breathing room will always look like an afterthought, no matter how carefully you arrange the bottles on top of it.
Look for a wall or zone with some natural flow. A dining room wall, a living room alcove, a spare cabinet niche, or a well-placed corner shelf can all work beautifully. The bar should look like it belongs in its spot, not like it wandered in from another room. If you are asking yourself whether it looks intentional, the answer is probably no, and it is worth reconsidering the spot.
Once you have your location, define the footprint. Use painter’s tape on the floor or wall if you need to visualize the space before committing. For width, most home bars look best between 36 and 60 inches wide. For surface height, aim for around counter height, roughly 36 inches, for comfortable access. Also check whether your spot is near a power outlet, since you will need electricity for lighting later.
A few things to consider as you choose your spot:
- Natural foot traffic flow (the bar should be easy to reach but not in anyone’s way)
- Wall space above the surface for a mirror, shelving, or art
- Visibility from the main seating area so guests can actually see and admire it
- Proximity to a power source for your lighting setup
- Floor space for a stool or side table if you plan to include seating
Getting the location right first saves you from rearranging the entire setup later. Also, a spot with good natural light during the day will look especially striking in photos..
Step 2: Choose Your Anchor Piece
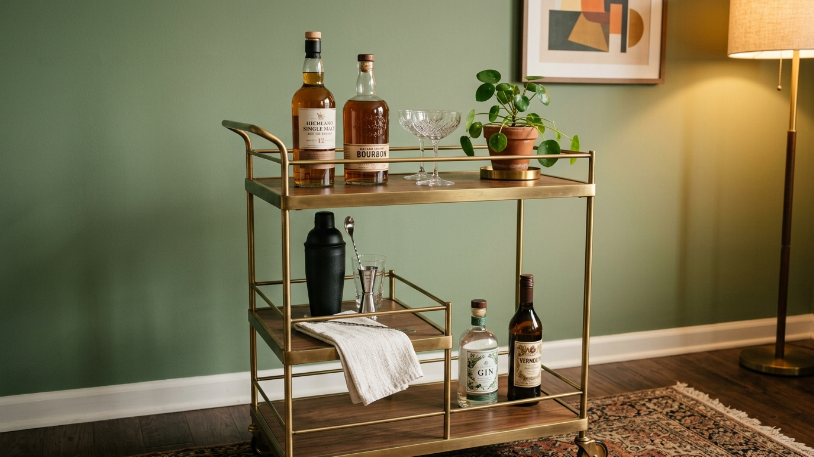
Your anchor piece is the backbone of the entire look. Everything else you add will be styled around it or displayed on top of it. Getting this choice right means your home bar will feel cohesive from day one.
You have four main anchor options:
- Bar cart: Best for small spaces, renters, or anyone who wants flexibility. Easy to move, easy to restyle, and usually more affordable than built-in alternatives.
- Bar cabinet: A cleaner, more contained look. You can close the doors and hide the clutter when guests are not around. Works especially well in formal or minimalist spaces.
- Credenza or sideboard: A smart dual-purpose pick. It gives you a full surface on top for styling and hidden storage below. Particularly effective in dining rooms.
- Built-in shelving or a wall niche: The most permanent and the most dramatic option. If you have an existing alcove or are willing to add floating shelves, this creates the biggest visual impact.
Choose your anchor based on your space size, your budget, and how permanent you want the setup to be. A brass or gold bar cart suits warmer, more eclectic interiors. A dark wood or lacquered cabinet fits a moodier, classic feel. A white or light oak sideboard works well in Scandinavian or minimalist rooms.
Scale matters here as well. Your anchor piece should fill the space without looking squeezed or adrift. As a general rule, the piece should span no less than two-thirds of the wall width you are working with.
Step 3: Set Your Color Palette When You Style a Home Bar
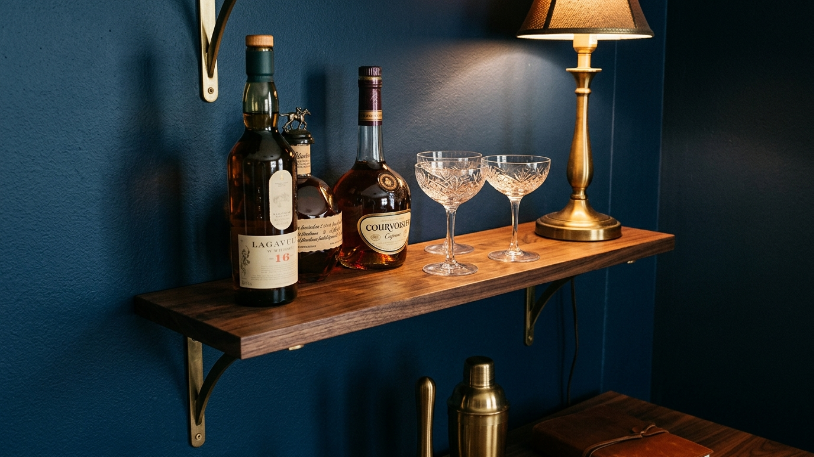
Color is what separates a curated bar from a cluttered one. When you style a home bar, you want a palette with three layers: a base, a mid-tone, and an accent. Sticking to this three-layer structure keeps the look pulled together even when you have many objects on display at once.
Your base color usually comes from the wall behind the bar or the color of your anchor piece itself. Mid-tones arrive through your glassware, bottle labels, trays, and any linens you include. Accents pop through small decorative objects, plants, candles, or hardware finishes.
Here is a quick reference for color pairings that work well in a home bar:
| Base Color | Mid-Tone | Accent | Overall Mood |
| Deep navy | Warm brass | Amber or cognac bottles | Rich, moody, classic |
| Sage green | Natural wood | Matte black | Earthy, modern, calm |
| Warm white | Rattan or wicker | Terracotta or burnt orange | Relaxed, bohemian |
| Charcoal gray | Smoked glass | Gold hardware | Sleek, bold, dramatic |
| Dusty blush | Champagne tones | Emerald green | Soft, eclectic |
| Matte black | White marble | Polished chrome | High-contrast, sharp |
For wall color inspiration, Sherwin-Williams has a helpful color explorer tool that lets you browse by mood and room type. Also, if you have a color in your head and want to pin down the exact shade, the Pantone Color Finder is a great precision resource.
Pick your palette before you buy anything else. Doing this one step first will save you from buying glassware that fights with your wall, or a tray that clashes with your hardware.
Step 4: Arrange Your Bottles and Glassware
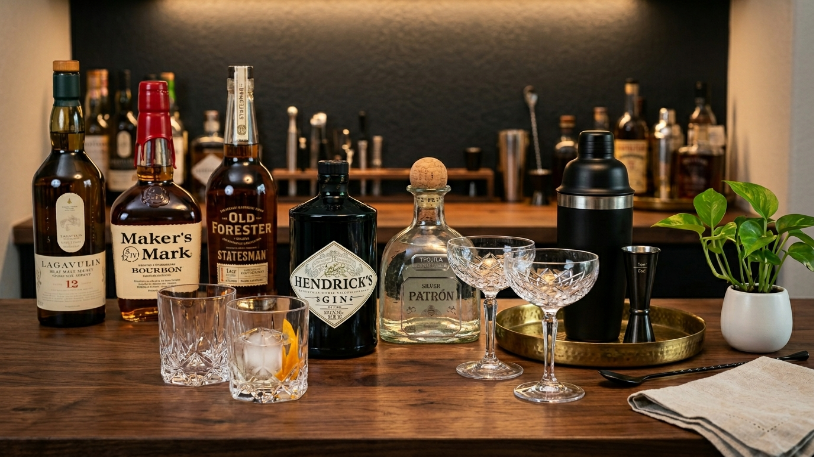
This is the step where most people stumble. They line their bottles up in a neat row and then wonder why the whole thing looks like a grocery store shelf. The trick to arranging bottles and glassware is to use height variation, intentional grouping, and negative space all at the same time.
Start with your tallest bottles at the back. Next, bring shorter bottles and glassware forward in a staggered, layered arrangement. Group bottles by type or by color rather than just by size. Three amber whiskey bottles clustered together look intentional. Those same three bottles spread randomly across the whole surface look like nobody was paying attention.
For glassware, place pieces in pairs or small groupings. Two coupe glasses together look deliberately styled. One coupe standing alone looks like it got separated from its friends. Also, try turning some glasses upside down and others right-side up to create subtle visual rhythm across the surface.
A simple arrangement formula to follow:
- Back row: Tallest bottles (whiskey, gin, wine, aperitivo)
- Middle row: Medium-height bottles, a small plant, a candle, or one decorative object
- Front row: Glassware, a tray with bar tools, and small accent pieces
Use a tray to anchor your bar tools. This single move instantly makes the whole surface look more organized. A round brass tray or a rectangular marble tray both work beautifully as a visual anchor within the arrangement.
Finally, leave some negative space. Not every inch of the surface needs to be covered. A little breathing room around your groupings actually makes each object look more important, not less.
Step 5: Get the Lighting Right
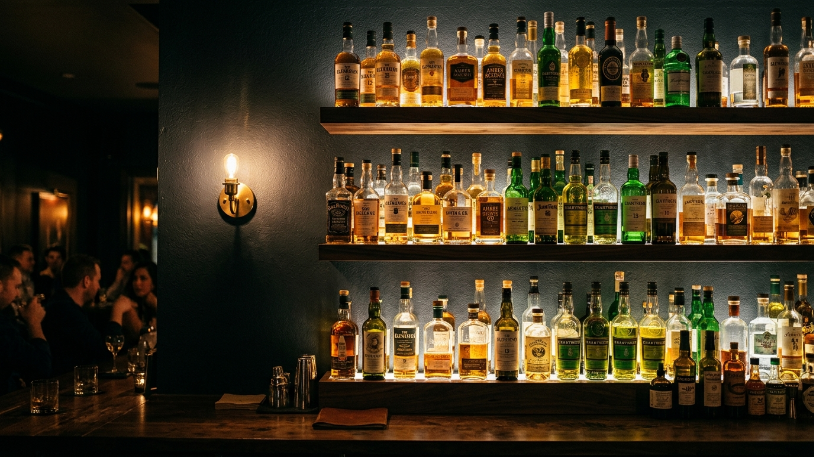
Lighting is the single most underrated element in how you style a home bar. You can have the most beautiful glassware and the most carefully arranged bottles in the world, but flat overhead lighting will make the whole setup look sad and lifeless. Good bar lighting does two things: it makes the bottles glow, and it sets the mood for the entire area.
Your best home bar lighting options:
- A small table lamp or wall sconce: Warm-toned bulbs between 2700K and 3000K placed at or just below bar surface height create a cozy, intimate glow.
- LED strip lights behind or under shelving: These backlight your bottles and create a dramatic effect with minimal effort and low cost.
- Puck lights inside a cabinet or niche: If your bar lives inside a cabinet, small battery-powered puck lights on each shelf work beautifully and require no wiring at all.
- A pendant lamp above the bar: If you have a countertop or island-style setup, a hanging pendant instantly gives the whole space a restaurant-quality feel.
Whatever you choose, always use warm white bulbs. Cool white or daylight bulbs wash out the warm amber tones of spirits and make the whole bar feel sterile, like a science lab rather than a stylish bar. The goal is a warm, inviting glow. Also, position your light so it hits the bottles from behind or from the side. Side lighting catches the facets of crystal glassware and makes everything sparkle in a way that stops people mid-sentence.
Step 6: Layer In Texture and Materials
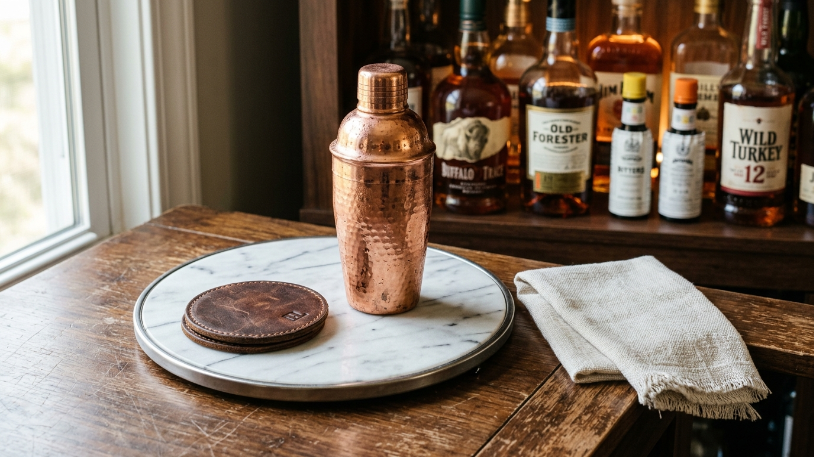
Once your bottles, glassware, and lighting are in place, it is time to add visual depth. Texture is what separates a properly styled bar from a simple storage shelf. When you look at a well-designed bar and feel drawn to keep looking at it, you are almost always responding to a mix of materials, even if you cannot name them.
The best materials to layer into a home bar setup:
- Marble or stone: Trays, coasters, or a marble-topped surface add visual weight and a sense of quality.
- Rattan or wicker: A small rattan tray or a wicker napkin basket adds warmth and contrast against harder surfaces.
- Leather: A leather-wrapped ice bucket or leather drink coasters feel rich and tactile.
- Linen or cotton: A folded bar towel or linen napkins soften the space and add a hospitality feel.
- Wood: Wooden trays, a cutting board used decoratively, or a serving board feel natural and grounding.
- Metal: Brass, copper, or matte black hardware and bar tools tie the whole color palette together.
The trick is not to use all of these at once. Pick two or three materials that complement your base color palette, then stay consistent. A brass and marble combination feels luxurious. A wood and linen combination feels relaxed and earthy. Too many materials at once creates visual noise rather than visual interest.
Also, vary the finish as much as the material itself. Matte surfaces placed next to glossy ones create depth without adding extra color or clutter.
Step 7: Style the Backdrop
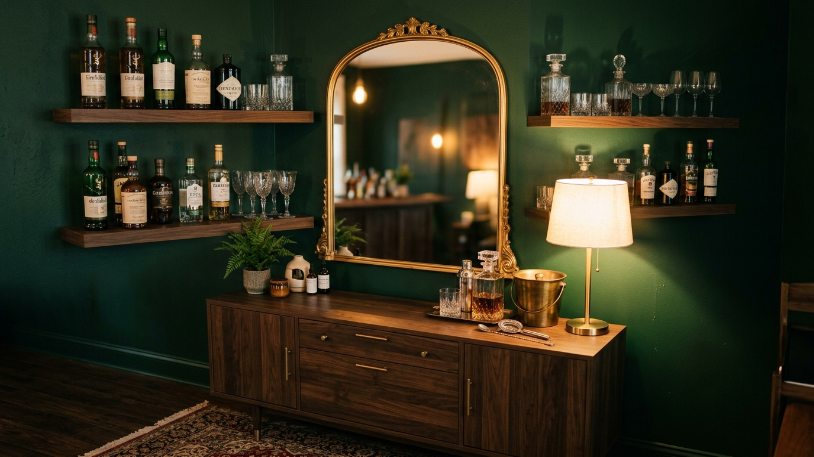
The backdrop is everything behind your bar setup. Most people forget about it entirely and then wonder why the whole look feels flat and unfinished. A well-chosen backdrop gives your home bar a deliberate, complete appearance, and it adds the visual depth that photographs so beautifully.
Your main backdrop options:
- A large mirror: The most classic and effective choice. A round, arched, or rectangular mirror reflects your bottles and doubles the visual impact of your lighting. It also makes the space feel larger.
- Open floating shelves: If you want to display more bottles and glassware, add one or two floating shelves above the bar surface. These extend the styling vertically and add storage at the same time.
- Art or a gallery wall: A single large-scale piece or a small gallery wall behind the bar adds personality without taking up any surface space.
- Wallpaper or a paint accent: A bold wallpaper panel or a deep painted accent wall behind the bar zone instantly defines the space and sets the whole tone of the look.
- Tile or panel molding: A tile backsplash or decorative wall molding adds architectural texture for those willing to put in a little more effort.
You do not need all of these. Pick one or two and execute them well. A large mirror paired with one floating shelf above is one of the most effective home bar backdrop combinations available, and it works at almost any budget level.
Step 8: Add Finishing Touches
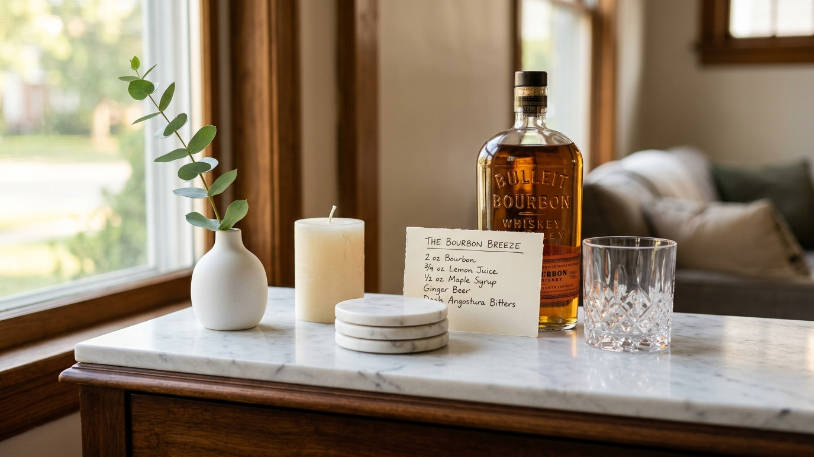
This final layer is also the most personal. Finishing touches are what make your bar feel like it belongs to you, not just like a display set up to look good in a catalog. They are also the easiest things to change or update as your taste evolves.
Good finishing touches for a styled home bar:
- Fresh or faux botanicals: A small trailing plant, a sprig of eucalyptus in a bud vase, or a single stem in a ceramic bottle adds life and softness.
- Candles: A pillar candle or a small scented candle adds warmth and texture even when it is unlit. Keep the scent mild near the bar so it does not compete with what people are drinking.
- A small print or piece of art: A framed cocktail recipe, a vintage aperitivo poster, or a small original piece adds real character.
- Cocktail recipe cards: A few cards stacked near the bar tools, or a small open recipe book, looks charming and is genuinely useful for guests.
- A personal object: One vintage find, a travel souvenir, or a sentimental piece that fits your palette. This is what turns a styled bar into your bar.
- Stacked coasters: A small stack of marble or leather coasters on the surface adds texture and signals that this bar is meant to be actually used.
The key is restraint. Add three to five finishing touches, not fifteen. Each object should earn its place by adding either visual interest or a practical function. When in doubt, take one thing away.
Common Mistakes When You Style a Home Bar
Even with a clear plan, a few common mistakes can flatten the whole look. Here is a quick guide to what to avoid:
| Do This | Not That |
| Group bottles in deliberate clusters | Line them all up in one straight row |
| Use warm white bulbs (2700K to 3000K) | Use cool white or daylight bulbs |
| Leave breathing room and negative space | Cover every inch of the surface |
| Mix two or three materials and finishes | Use only one texture throughout |
| Define the space with a backdrop | Leave the wall behind completely bare |
| Use a tray to anchor and organize bar tools | Scatter tools loosely across the surface |
| Choose glassware that fits your style | Put every type of glass you own on display |
| Scale your anchor piece to the wall width | Use a piece that is too small for the space |
Following this list will get you past the vast majority of mistakes that make a home bar look thrown together rather than designed.
How to Style a Home Bar on Any Budget
You do not need to spend thousands of dollars to get a genuinely great result. Here is a simple breakdown by budget tier:
| Budget Tier | What to Prioritize First | Approximate Spend |
| Under $200 | A bar cart, one tray, basic glassware, a warm lamp | $150 to $200 |
| $200 to $500 | Sideboard or cabinet, curated glassware set, LED lighting, a mirror | $300 to $500 |
| $500 to $1,000 | Quality anchor piece, full glassware collection, pendant light, art or wallpaper | $600 to $900 |
| $1,000 and up | Built-in shelving, premium materials, custom lighting, full professional styling | $1,000 and beyond |
The best value moves at any budget level are lighting and a well-chosen backdrop. These two elements do more for the visual impact of the overall look than any expensive bottle or specialty bar tool. If your budget is tight, spend it on a warm lamp and a well-placed mirror before you spend it on anything else.
Final Thoughts
Styling a home bar is not about spending more. It is about layering thoughtfully and staying intentional at every step. Start with your location. Build your foundation with the right anchor piece and color palette. Add light, add texture, and finish with a handful of personal touches that make the space yours.
Plus, the best home bars are the ones that actually get used. Do not style it so carefully that it becomes a museum exhibit. Pour something, invite some people over, and enjoy what you built.